When researching underfloor heating for an existing home, many people come across two main installation approaches: traditional overlay underfloor heating systems and modern milled underfloor heating installed directly into concrete floors.
Because overlay systems have been widely used for many years, it is understandable that homeowners often assume an overlay or screed build-up is required for underfloor heating to work effectively. In reality, advances in installation techniques now allow water underfloor heating to be retrofitted into existing concrete or screed floors without an overlay, using precision milling.
Both methods can deliver excellent comfort when properly designed. The difference lies in how the heat is transferred and how the system integrates with the existing structure of the building.
What is an overlay underfloor heating system?
An overlay system involves installing insulation panels or low-profile boards on top of the existing floor, laying the underfloor heating pipework within them, and then covering the system with a new screed or floating floor construction.
This approach is commonly used in new builds and some renovations because it creates a complete heating layer above the structural slab. However, in retrofit projects it also introduces:
- An increase in finished floor height
- Longer warm-up times due to thicker build-up
- The need to modify doors, skirting and thresholds
- Additional drying time when new screed is used
What is underfloor heating without an overlay?
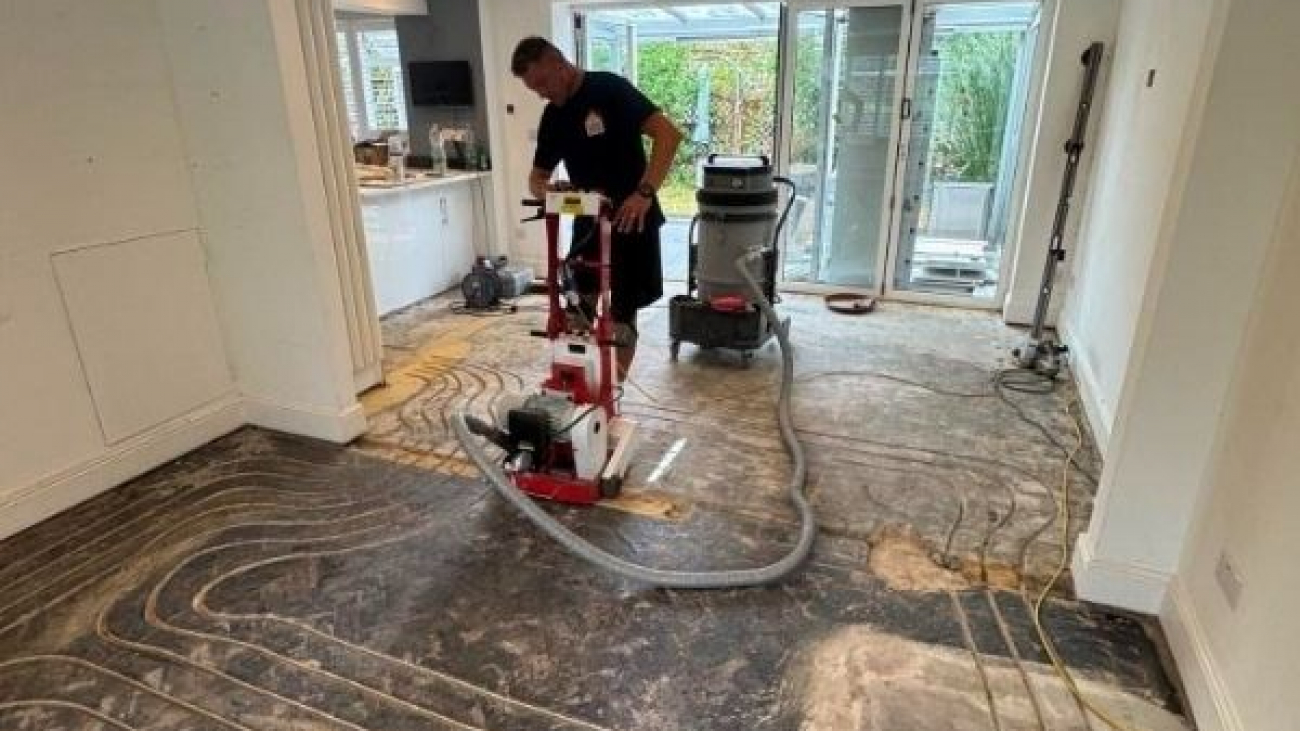
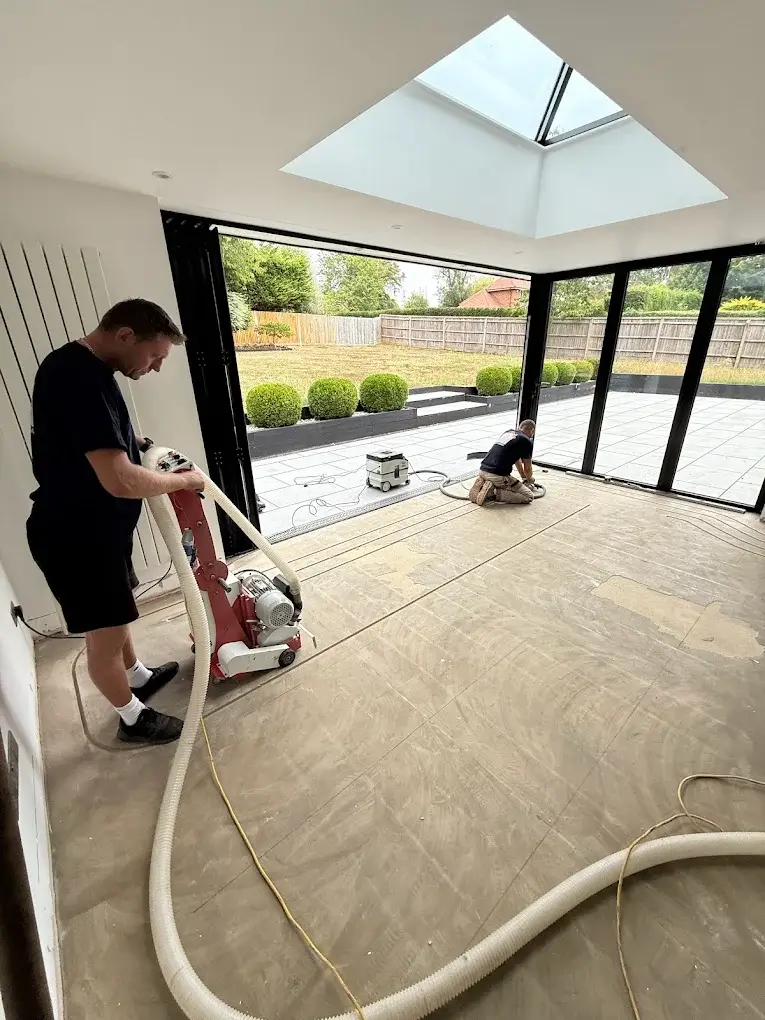
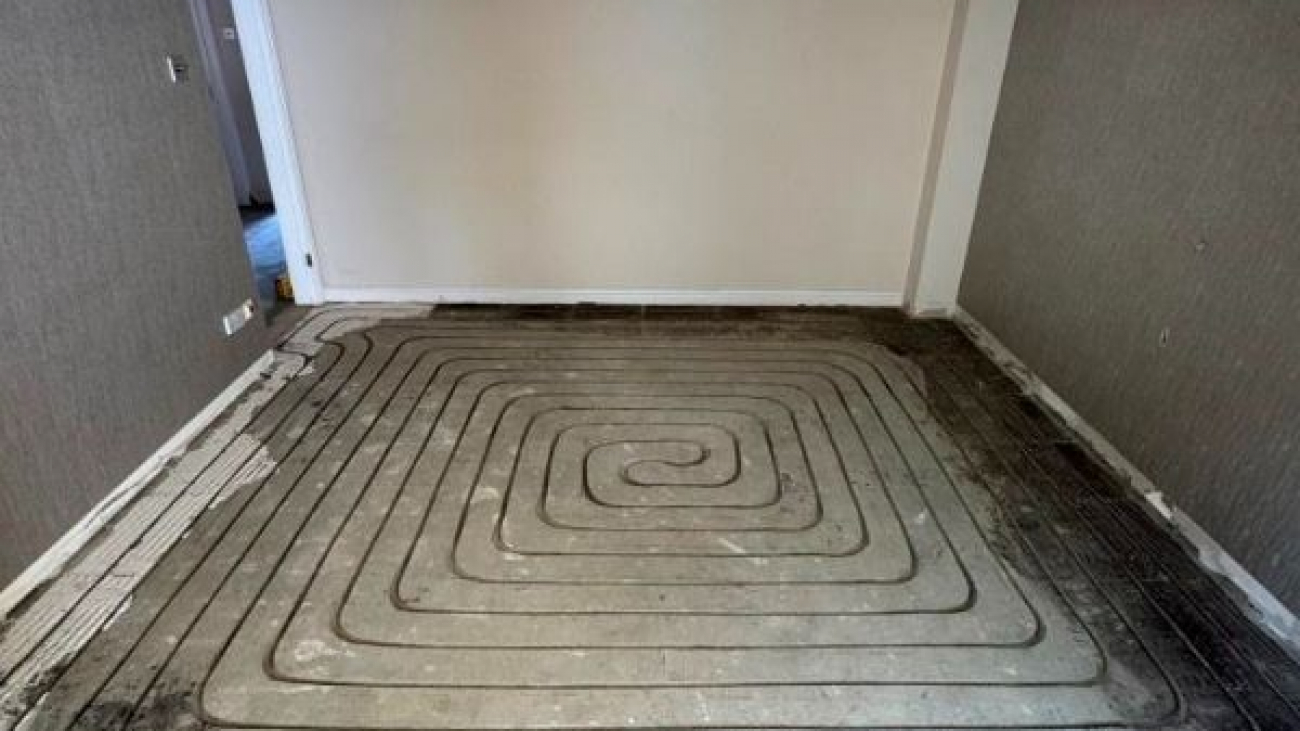
With a milled underfloor heating system, the heating pipes are installed directly into channels cut into the existing concrete or screed slab. No insulation boards or additional screed layers are added on top.
This creates a true low-profile underfloor heating system where:
- The floor height remains unchanged
- The pipework sits closer to the finished surface
- The existing concrete acts as a stable thermal mass
- The system can be installed quickly, often within 1–2 days
This method is particularly suited to retrofit underfloor heating in existing concrete floors, where maintaining levels and minimising disruption are important.
How heat transfer differs between overlay and milled systems?
Overlay underfloor heating
In an overlay system, heat travels through multiple layers:
Pipe → overlay board → screed or levelling compound → floor finish → room
This creates a larger thermal mass above the pipes, which can provide stability but often results in:
- Slower heat-up times
- Higher flow temperatures
- Reduced responsiveness to thermostat changes
Milled underfloor heating in concrete floors
With a milled system, the heat path is much shorter:
Pipe → existing concrete slab → floor finish → room
Because the pipes are closer to the surface:
- Heat reaches the room more quickly
- Lower water temperatures can be used
- The system responds faster
- Efficiency improves, particularly with heat pumps
This is why milled water underfloor heating is often described as a highly efficient low-temperature heating system for retrofit projects.
Why overlay systems became standard
Overlay systems were developed to standardise construction build-ups and simplify installation on site, especially in new developments. They remain a valid solution in many situations, particularly where insulation upgrades and full floor reconstructions are already planned.
The perception that underfloor heating must sit in an overlay is largely due to familiarity rather than performance limitations.
Why underfloor heating without screed is increasingly chosen for retrofit projects
For existing properties, particularly those with solid concrete floors, installing underfloor heating without an overlay offers several practical advantages:
- No increase in floor height
- No need to remove the existing slab
- No long screed drying times
- Faster installation programmes
- Excellent compatibility with heat pumps
- Even heat distribution using the concrete as a thermal store
Rather than adding layers, this approach integrates the heating directly into the building fabric, making it one of the most effective solutions for retrofit underfloor heating on existing concrete slabs.
Choosing the right underfloor heating system for your home
Both overlay and milled systems can provide comfortable, efficient heating when correctly designed. The most suitable option depends on:
- Floor construction and available depth
- Whether insulation upgrades are planned
- Ceiling height limitations
- The heat source (boiler or heat pump)
- Desired response time and control
- Installation timeframe and disruption tolerance
In many renovation projects where maintaining levels and achieving fast, efficient heating is a priority, underfloor heating installed directly into the concrete floor using milling offers a technically elegant and future-proof solution.
So is there a definitive answer?
The idea that underfloor heating must be installed with an overlay or thick screed comes from traditional construction practice rather than a technical requirement. Modern milling techniques allow water underfloor heating to be installed without an overlay, often delivering faster response times, lower running temperatures and excellent compatibility with low-carbon heating systems.
Understanding both approaches allows homeowners to make informed decisions based on performance, efficiency and practicality, rather than assumption.
Book a free underfloor heating assessment
If you’re considering underfloor heating in an existing property and want to understand whether a milled, no-overlay system is suitable for your concrete or screed floor, a professional assessment is the best place to start.
We’ll review your floor construction, heating system and renovation plans, and provide clear advice on the most efficient and practical solution for your home.
Book your free, no-obligation underfloor heating assessment today.